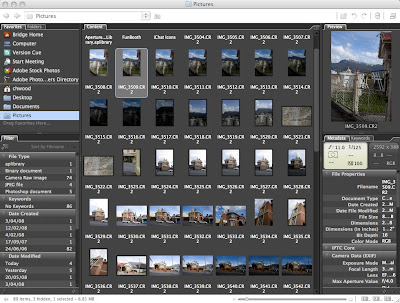


When you have your shots downloaded to your computer, use Adobe Bridge to browse to your Raw images and double click to open in Photoshop.
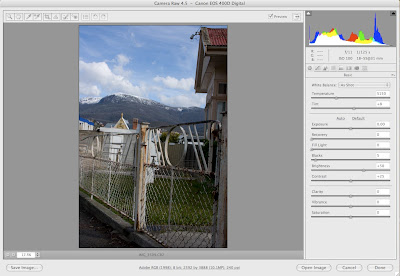
The file will now open up in the Raw plugin which is standard in CS3. On the left panel adjust the exposure control to put the pic where it starts to look good. Use a combo of the controls to get the image looking natural. All the controls are well labeled and do what you would expect.
The histogram on the top of the controls provides a great way of checking out the detail and range of colour in the shot. If you are not used to looking at a histogram then work off the image. The histogram shows the spread of tonality across the image, you would normally expect it to look something like a mountanious island coming out of the sea, large dips or holes in the island can indicate a potential problem with the image. I will go into more detail on reading histograms in a later post.
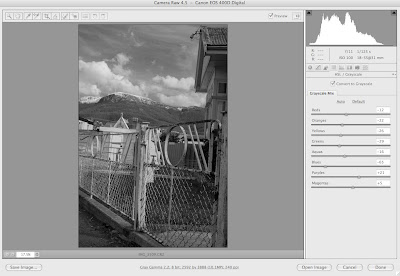
If you want to convert to Black and White then there is a great set of tools that allow you to alter the way colours convert to greyscale. Remember all of this work is non destructive. Take you time and approach it just like you would working in a darkroom. This is a critical time in getting your image right.
Trust your eyes... if it looks good then you are on the right track.
If you want a dramatic sky then try pulling down the blue slider until you are happy with the result.
Once you click ok (or option click ok to make a copy) you will head into Photoshop ready to push things further.
No comments:
Post a Comment